
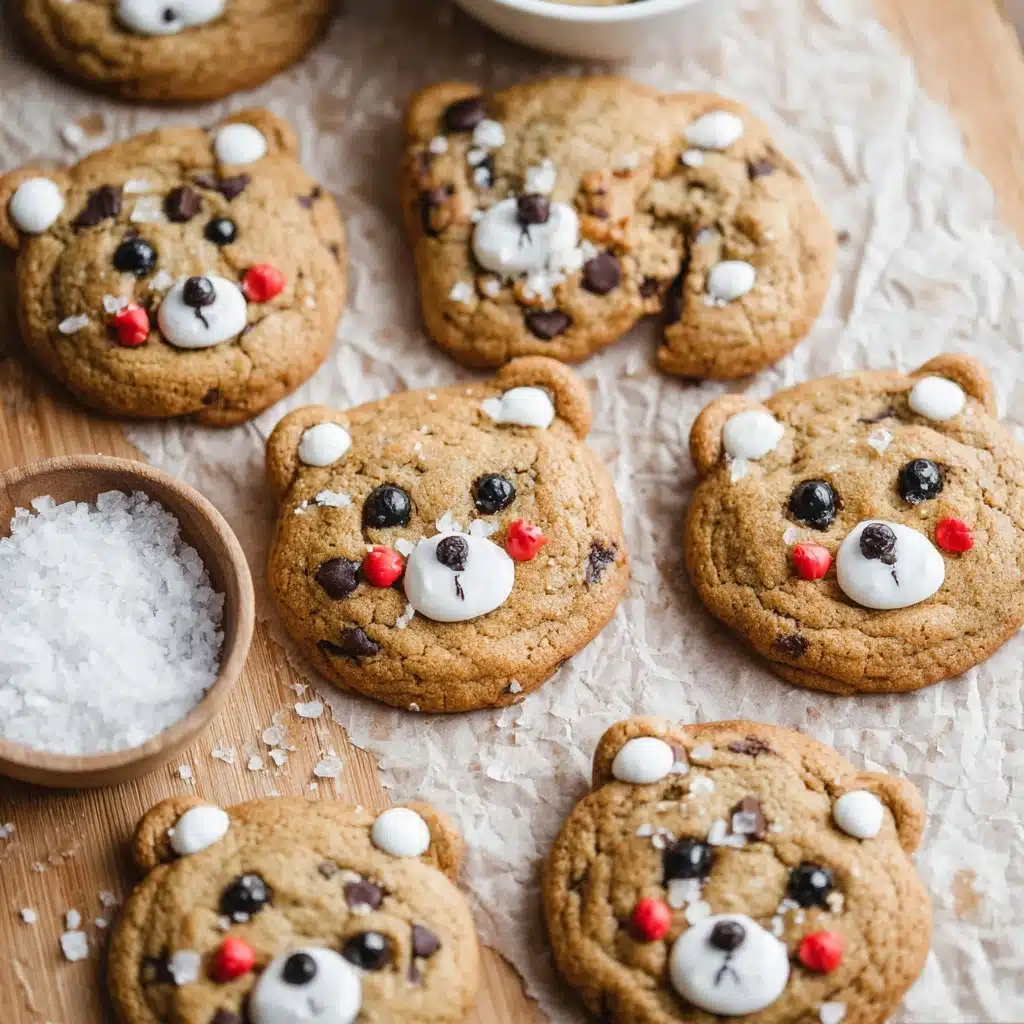
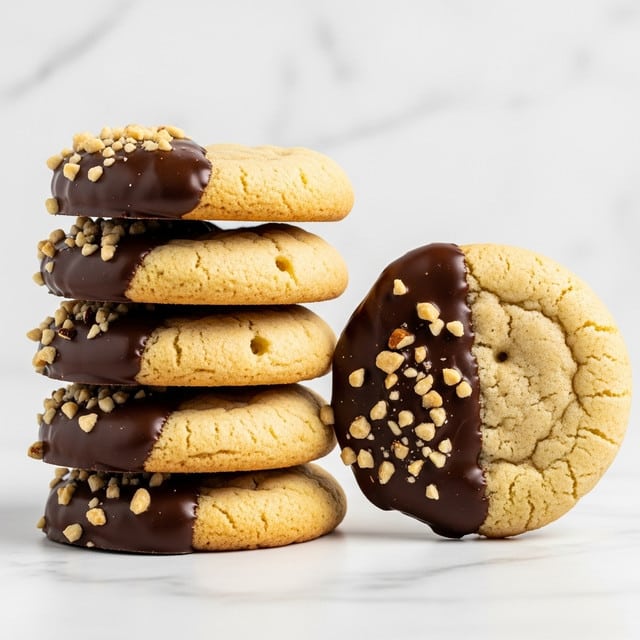
Teddy Bear Chocolate Chip Cookies Recipe
If you have a soft spot for charming and irresistibly delicious treats, then you are going to adore these Teddy Bear Chocolate Chip Cookies. These delightful cookies not only satisfy your sweet tooth with their classic chocolate chip goodness but also bring a playful twist by shaping each cookie into an adorable teddy bear face. The tender, buttery cookie base combined with melty chocolate chips makes every bite a heartwarming experience, while the colorful icing adds that extra dash of personality and fun. Whether you’re baking for kids, hosting a party, or just craving a comforting homemade dessert, these Teddy Bear Chocolate Chip Cookies are guaranteed to bring smiles and sweet moments to your kitchen and beyond.
Ingredients You’ll Need
Creating these Teddy Bear Chocolate Chip Cookies is a breeze because the ingredients are simple yet thoughtfully chosen to give you that perfect balance of flavor, texture, and visual appeal. Each component plays a key role in making the cookies tender, chewy, and lovable.
- 1 ½ cup all-purpose flour: The sturdy foundation that gives the cookies their structure.
- ¼ tsp baking powder: Adds a gentle lift to keep the cookies light.
- ½ tsp baking soda: Helps balance the texture, creating a slight chewiness.
- ¾ tsp table salt: Enhances all the flavors in the cookie.
- ½ cup unsalted butter (melted and cooled): Provides richness and soft texture.
- ⅓ cup brown sugar (packed): Adds deep caramel notes and moisture.
- ½ cup granulated sugar: Balances sweetness and helps with crisp edges.
- 1 egg: Binds everything together perfectly.
- 1 tsp vanilla extract: Infuses a warm, comforting aroma and flavor.
- 1 cup chocolate chips: Chocolatey pockets of joy in every bite.
- 4 tbsp powdered sugar: The base for the smooth and sweet icing decoration.
- 1-2½ tsp water: Adjusted to get the perfect icing consistency for decorating.
- Food coloring (black and pink or red): Brings the teddy bears to life with expressive details.
How to Make Teddy Bear Chocolate Chip Cookies
Step 1: Mix Dry Ingredients
Start the magic by combining your dry ingredients in a medium bowl. Whisk together the all-purpose flour, baking powder, baking soda, and salt until evenly distributed. This blend is crucial to achieving the right texture for those tender yet chewy Teddy Bear Chocolate Chip Cookies.
Step 2: Combine Butter and Sugars
In a separate larger bowl, stir together the melted unsalted butter with the brown and granulated sugars using a silicone spatula. Mixing these while the butter is warm helps dissolve the sugars slightly, resulting in a smooth, glossy base for your dough that will yield cookies bursting with flavor.
Step 3: Add Egg and Vanilla
Beat in the egg and vanilla extract to the butter-sugar mixture. These ingredients bring moisture and aroma, making your Teddy Bear Chocolate Chip Cookies irresistibly soft and richly scented. Stir the mixture until entirely smooth and luscious.
Step 4: Combine Dry Ingredients and Chocolate Chips
Gradually add all your dry ingredients into the wet mixture, then fold in the chocolate chips. You want to mix just until no dry spots remain, ensuring that the love-soaked flour and sweet chips are evenly spread throughout every cookie dough ball.
Step 5: Scoop and Shape the Cookies
Preheat your oven to 350°F (177°C) and line two baking sheets with parchment paper or silicone mats. Using a medium cookie scoop, portion out dough balls about 2 to 3 tablespoons each, spacing them 3 to 4 inches apart.
Step 6: Add the Bear Ears
To create the charming teddy bear shape, carefully place two small teaspoon-sized dough balls on the left and right sides of each larger cookie dough ball. These will form the ears, giving your cookies that adorable character everyone will adore.
Step 7: Bake and Shape While Warm
Bake the cookies for 11 to 13 minutes, until the edges are lightly golden and set. After removing from the oven, allow them to cool on the baking tray for about 5 minutes. For a rounder, more bear-like form, gently push around the edges of the warm cookies with a silicone spatula — but be quick, this trick only works while they’re still hot.
Step 8: Decorate Your Teddy Bear Chocolate Chip Cookies
Now for the best part—decorating! Prepare your icing by mixing powdered sugar with a small amount of water, adding it gradually to achieve a perfect piping consistency. Divide the icing into three portions: one stays white for snouts and ears, add pink or red food coloring to another portion for cute blush marks, and black to the last for noses and eyes. Use piping bags or even a toothpick to bring your lovable bears to life with expressive features. Let each layer set before adding the next to keep the colors sharp and the design neat.
How to Serve Teddy Bear Chocolate Chip Cookies

Garnishes
For extra charm, consider adding edible glitter or tiny colored sugar sprinkles around your cookies once the icing has dried. This adds sparkle and festive spirit, turning your Teddy Bear Chocolate Chip Cookies into party-ready show stoppers perfect for birthdays or cozy tea times.
Side Dishes
Nothing pairs better with these sweet treats than a cold glass of milk or a warm cup of herbal tea. For an extra indulgent experience, serve your cookies alongside a scoop of vanilla ice cream or a dollop of fresh whipped cream. These sides complement the rich chocolate chips and buttery dough beautifully.
Creative Ways to Present
Arrange your Teddy Bear Chocolate Chip Cookies on a whimsical platter or a rustic wooden board to highlight their homemade charm. You could even place them in little gift bags tied with a ribbon as adorable favors for guests or as heartfelt homemade gifts for friends and family. The playful shape and coloring make them an instant hit wherever they go.
Make Ahead and Storage
Storing Leftovers
To keep your Teddy Bear Chocolate Chip Cookies fresh and soft, store them in an airtight container at room temperature. Avoid stacking them until the icing has completely hardened to prevent smudging. Stored properly, these cookies will stay delicious for up to 4 days.
Freezing
You can freeze both the baked cookies or the dough. Wrap baked cookies tightly in plastic wrap and place them in a freezer-safe container for up to 3 months. Alternatively, portion the cookie dough into balls and freeze on a baking sheet before transferring to a bag. When ready to bake, just thaw in the refrigerator overnight and proceed as usual.
Reheating
If you prefer your Teddy Bear Chocolate Chip Cookies warm, simply microwave a cookie for 10 to 15 seconds or reheat in a 300°F oven for 3 to 5 minutes. This refreshes the gooey texture and softens the chocolate chips, making them taste freshly baked once again.
FAQs
Can I use salted butter instead of unsalted in this recipe?
Yes, but reduce or omit the additional salt to prevent your Teddy Bear Chocolate Chip Cookies from becoming too salty. Unsalted butter gives you greater control over the salt balance.
How do I make sure the teddy bear shape turns out well?
Adding the small dough ears right before baking and gently shaping the warm cookies with a spatula helps achieve the perfect bear silhouette. Be sure not to move them too much after baking to maintain their form.
Can I substitute chocolate chips with chunks or different types of chocolate?
Absolutely! Chocolate chunks, white chocolate, or even a mix of nuts and dried fruits can be fun alternatives to customize your Teddy Bear Chocolate Chip Cookies.
Is the icing recipe difficult to make?
Not at all. The icing is a simple powdered sugar and water mixture, easy to adjust for consistency. Using food coloring and piping bags adds a playful decorating element that is very beginner-friendly.
Are these cookies kid-friendly to make together?
Definitely! Kids will love shaping the ears and decorating the cookies. It’s a fun, hands-on activity that makes the baking experience even more memorable and enjoyable.
Final Thoughts
These Teddy Bear Chocolate Chip Cookies are pure joy in cookie form. From the soft, chocolate-studded dough to the charming decorated faces, every step feels like a warm hug from your oven. I cannot wait for you to try this recipe and watch your kitchen fill with smiles and sweet memories. Happy baking and even happier snacking!
Print
Teddy Bear Chocolate Chip Cookies Recipe
- Total Time: 45 minutes
- Yield: Approximately 18 cookies 1x
- Diet: Vegetarian
Description
Delight your taste buds with Teddy Bear Chocolate Chip Cookies, charmingly decorated soft and chewy cookies perfect for all ages. These cookies combine classic chocolate chip cookie flavors with adorable bear designs, made easy with a simple dyeable icing. They are a fun baking project and a sweet treat for any occasion.
Ingredients
Dry Ingredients
- 1 ½ cup all-purpose flour
- ¼ tsp baking powder
- ½ tsp baking soda
- ¾ tsp table salt
Wet Ingredients
- ½ cup unsalted butter, melted and cooled
- ⅓ cup brown sugar, packed
- ½ cup granulated sugar
- 1 egg
- 1 tsp vanilla extract
Mix-ins and Decorations
- 1 cup chocolate chips
- 4 tbsp powdered sugar
- 1–2½ tsp water
- Food coloring (black, pink or red)
Instructions
- Make the cookie dough: In a medium bowl, mix together all the dry ingredients: the all-purpose flour, baking powder, baking soda, and table salt, until well combined.
- Mix butter and sugars: In a large bowl, use a silicone spatula to thoroughly mix the melted unsalted butter, brown sugar, and granulated sugar until the mixture is smooth and combined.
- Add egg and vanilla: Incorporate the egg and vanilla extract into the butter and sugar mixture, stirring until the batter is smooth and uniform.
- Add dry ingredients and chocolate chips: Gradually add the dry ingredient mixture and the chocolate chips into the wet mixture, stirring until no dry spots remain and the dough is evenly mixed.
- Preheat oven and prepare trays: Place your oven rack in the middle position and preheat the oven to 350°F (177°C). Line two baking sheets with parchment paper or a silicone baking mat.
- Scoop cookie dough: Using a medium cookie dough scoop, place 2-3 tablespoon-sized scoops onto the prepared baking sheets, spacing them 3-4 inches apart to allow for spreading.
- Add ears: For the bear ears, place one teaspoon-sized dough balls on the top left and right sides of each cookie dough ball on the baking trays.
- Bake cookies: Bake the cookies for 11-13 minutes or until the edges are set and golden brown. Allow cookies to cool on the baking sheets for about 5 minutes before transferring them to a wire rack to cool completely. For rounder bears, gently push the edges of warm cookies with a silicone spatula while still hot.
- Prepare icing: In a small bowl, mix 4 tablespoons of powdered sugar with ¼ teaspoon of water at a time, until pipeable consistency is achieved. You may need up to 2½ teaspoons water; adjust as needed.
- Divide icing and add color: Pour half the icing into a piping bag for white color (for the snout and ears). Add pink or red food coloring to the remaining icing, mix well, and transfer half of this tinted icing to another piping bag for blush detail. Add black food coloring to the remaining icing, mix well, and place in a third piping bag for nose and eyes.
- Decorate cookies: Snip the ends of the piping bags and first pipe white icing to form the snouts and ears. Once semi-dry, pipe black icing to create the noses and eyes, then finish with the pink blush touches.
- Enjoy: Let the decorated cookies dry completely before serving. Enjoy your adorable and delicious Teddy Bear Chocolate Chip Cookies!
Notes
- Use a silicone spatula for easier mixing and scraping.
- Allow cookies to cool slightly before transferring to avoid breaking.
- Adjust water and powdered sugar in icing for the perfect piping consistency.
- Decorate the cookies in layers by letting each color set to prevent bleeding.
- For softer cookies, do not overbake; edges should be set but centers slightly soft.
- Store decorated cookies in an airtight container at room temperature for up to 5 days.
- Prep Time: 20 minutes
- Cook Time: 13 minutes
- Category: Dessert, Snack
- Method: Baking
- Cuisine: American
Nutrition
- Serving Size: 1 cookie (approx. 40g)
- Calories: 170
- Sugar: 15g
- Sodium: 160mg
- Fat: 8g
- Saturated Fat: 5g
- Unsaturated Fat: 2.5g
- Trans Fat: 0g
- Carbohydrates: 22g
- Fiber: 1g
- Protein: 2g
- Cholesterol: 25mg
Keywords: Teddy Bear Cookies, Chocolate Chip Cookies, Decorative Cookies, Kid-Friendly Cookies, Fun Dessert Recipe

