
No Bake Raspberry Cheesecake Recipe
Introduction
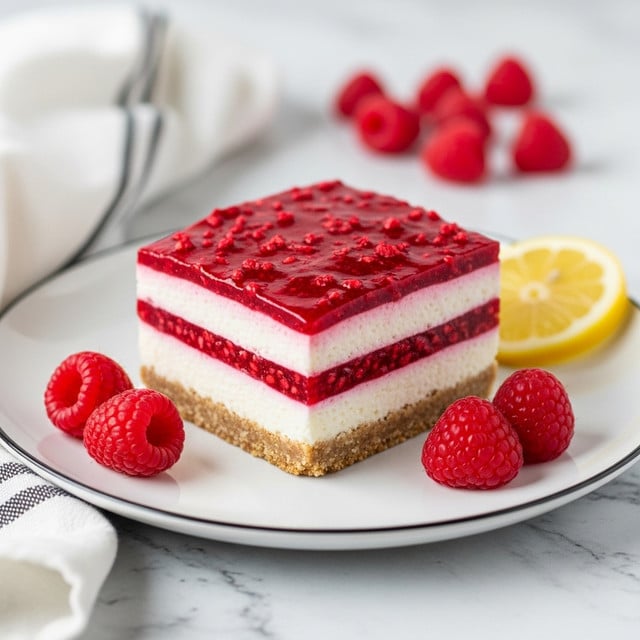
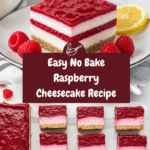
This no bake raspberry cheesecake is a refreshing and creamy dessert that’s perfect for warm days or when you want a fuss-free treat. Combining a buttery graham cracker crust with a smooth cream cheese filling and vibrant raspberry topping, it’s sure to impress your family and friends.
Ingredients
- 3 cups frozen raspberries
- ⅓ cup granulated sugar
- 1 tablespoon fresh lemon juice
- 2 tablespoons cornstarch
- 1½ tablespoons water
- 1¾ cups graham cracker crumbs
- 6 tablespoons unsalted butter, melted and cooled
- 1 tablespoon granulated sugar
- ½ teaspoon salt
- 16 ounces cream cheese, softened to room temperature
- 1 cup powdered sugar
- 2 tablespoons fresh lemon juice
- 1 teaspoon vanilla extract
- 8 ounces frozen whipped topping, thawed
Instructions
- Step 1: In a medium saucepan over medium heat, combine the frozen raspberries, granulated sugar, and lemon juice. Bring to a boil and cook for 3 to 4 minutes, stirring frequently to prevent burning.
- Step 2: In a small bowl, mix the cornstarch and water to make a slurry. Stir this into the boiling raspberry mixture and cook for another minute until the sauce thickens. Remove from heat and let it cool.
- Step 3: In a medium bowl, mix graham cracker crumbs, melted butter, granulated sugar, and salt until well combined.
- Step 4: Line a 9×9-inch baking pan with parchment paper, leaving an overhang on the sides to easily lift the cheesecake out later.
- Step 5: Firmly press the crust mixture into the bottom of the prepared pan. Set aside.
- Step 6: In a large bowl, beat together cream cheese, powdered sugar, lemon juice, and vanilla extract for 1 to 2 minutes until smooth and fluffy.
- Step 7: Gently fold the thawed whipped topping into the cream cheese mixture until fully combined.
- Step 8: Spread the cream cheese mixture evenly over the crust layer.
- Step 9: Spoon the cooled raspberry sauce over the cream cheese layer.
- Step 10: Refrigerate for at least 6 hours or overnight to set before serving.
Tips & Variations
- For a tart twist, use fresh raspberries instead of frozen when in season.
- Add a handful of chopped nuts or chocolate chips to the crust for extra texture.
- Use lemon zest in the cream cheese layer to enhance the citrus flavor.
- To make individual servings, prepare the recipe in small jars or cups.
Storage
Store the cheesecake covered in the refrigerator for up to 3 days. For best texture, avoid freezing as the whipped topping may separate. When ready to serve, slice and enjoy straight from the fridge; no reheating needed.
How to Serve
Serve this delicious recipe with your favorite sides.
FAQs
Can I use fresh raspberries instead of frozen?
Yes, fresh raspberries work well if they’re in season. You may need to adjust the cooking time slightly as fresh berries may release less liquid than frozen.
What can I substitute for the whipped topping?
You can use homemade whipped cream or a dairy-free whipped topping if you prefer. Just be sure it is thawed or freshly whipped before folding into the cream cheese mixture.
Print
No Bake Raspberry Cheesecake Recipe
- Total Time: 6 hours 30 minutes
- Yield: 9 servings 1x
- Diet: Vegetarian
Description
This No Bake Raspberry Cheesecake is a creamy and refreshing dessert featuring a crunchy graham cracker crust, a smooth cream cheese filling, and a vibrant homemade raspberry topping. It requires no oven baking, making it perfect for a quick yet elegant treat that can be prepared ahead and chilled until ready to serve.
Ingredients
Raspberry Sauce
- 3 cups frozen raspberries
- ⅓ cup granulated sugar
- 1 tablespoon fresh lemon juice
- 2 tablespoons cornstarch
- 1½ tablespoons water
Crust
- 1¾ cups graham cracker crumbs
- 6 tablespoons unsalted butter, melted and cooled
- 1 tablespoon granulated sugar
- ½ teaspoon salt
Cheesecake Filling
- 16 ounces cream cheese, softened to room temperature
- 1 cup powdered sugar
- 2 tablespoons fresh lemon juice
- 1 teaspoon vanilla extract
- 8 ounces frozen whipped topping, thawed
Instructions
- Prepare Raspberry Sauce: In a medium-sized saucepan over medium heat, combine frozen raspberries, granulated sugar, and fresh lemon juice. Bring the mixture to a boil, cooking for 3 to 4 minutes while stirring frequently to prevent burning.
- Thicken Raspberry Sauce: In a small bowl, mix cornstarch and water to form a slurry. Add this to the boiling raspberry mixture and cook for an additional minute until the sauce thickens. Remove from heat and let it cool completely.
- Make Crust Mixture: In a medium bowl, combine graham cracker crumbs, melted butter, granulated sugar, and salt. Stir until the mixture is evenly moistened and crumbly.
- Prepare Baking Pan: Line a 9×9-inch baking pan with parchment paper, ensuring enough overhang on the sides to easily lift out the cheesecake later.
- Form Crust Base: Firmly press the crumb mixture into the bottom of the lined pan to create an even layer. Set aside.
- Mix Cheesecake Filling: In a large mixing bowl, add softened cream cheese, powdered sugar, fresh lemon juice, and vanilla extract. Beat for 1 to 2 minutes until the mixture is smooth and fluffy.
- Incorporate Whipped Topping: Fold the thawed whipped topping gently into the cream cheese mixture until fully combined and creamy.
- Assemble Cheesecake: Spread the cream cheese mixture evenly over the prepared crust in the pan.
- Add Raspberry Topping: Spoon the cooled raspberry sauce evenly over the cream cheese layer.
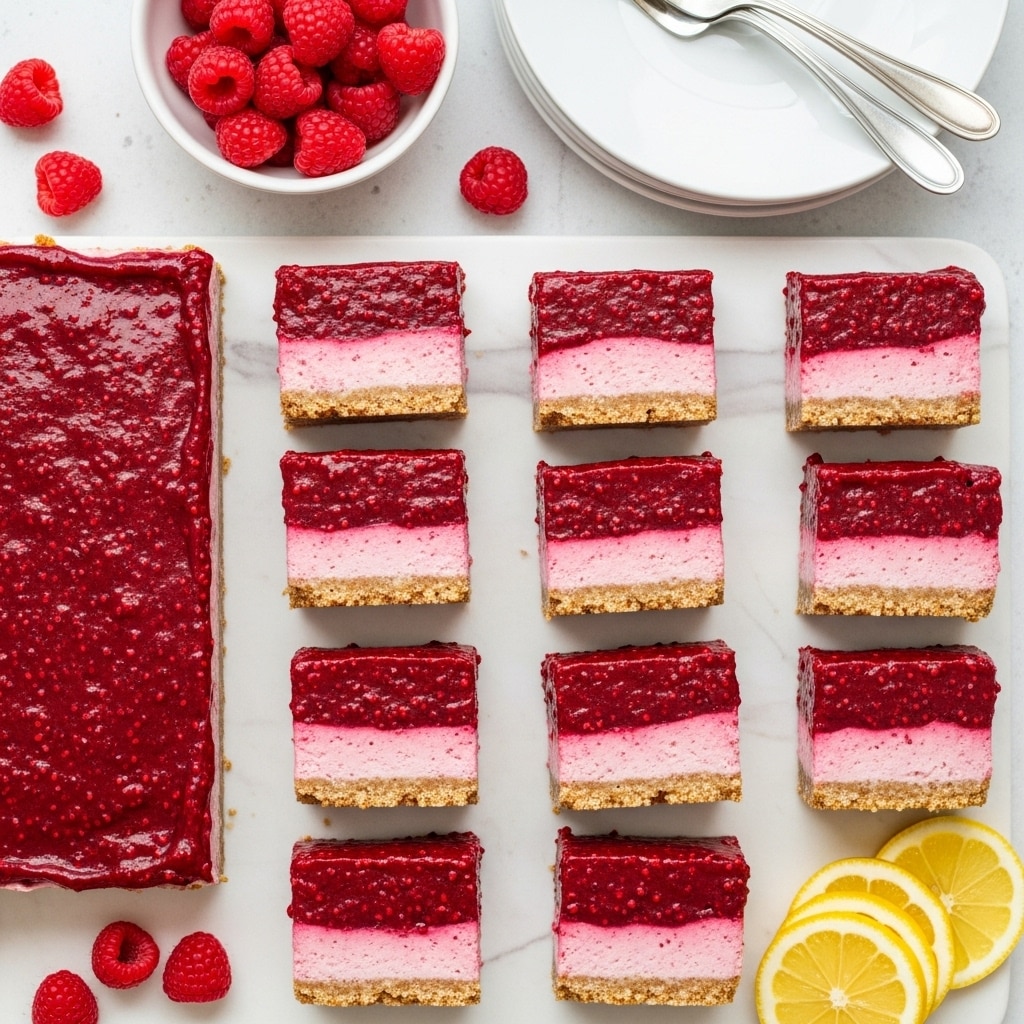
- Chill and Set: Refrigerate the assembled cheesecake for at least 6 hours or overnight until firm and chilled before slicing and serving.
Notes
- Be sure to cool the raspberry sauce completely before spreading it over the cream cheese layer to prevent it from mixing.
- Softening the cream cheese to room temperature is crucial for a smooth, lump-free filling.
- If parchment paper is unavailable, lightly grease the pan to prevent sticking.
- This cheesecake is best served chilled and can be stored in the refrigerator for up to 3 days.
- For a decorative touch, garnish with fresh raspberries or mint leaves before serving.
- Prep Time: 20 minutes
- Cook Time: 10 minutes
- Category: Dessert
- Method: Stovetop
- Cuisine: American
Keywords: no bake cheesecake, raspberry cheesecake, easy dessert, no bake dessert, cream cheese dessert, summer dessert, quick cheesecake
