
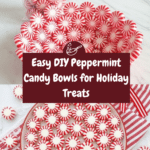
DIY Peppermint Candy Bowls Recipe
Introduction
Making your own peppermint candy bowls is a festive and fun way to serve treats during the holiday season. These edible bowls are simple to create and add a charming touch to any party or dessert table.

Ingredients
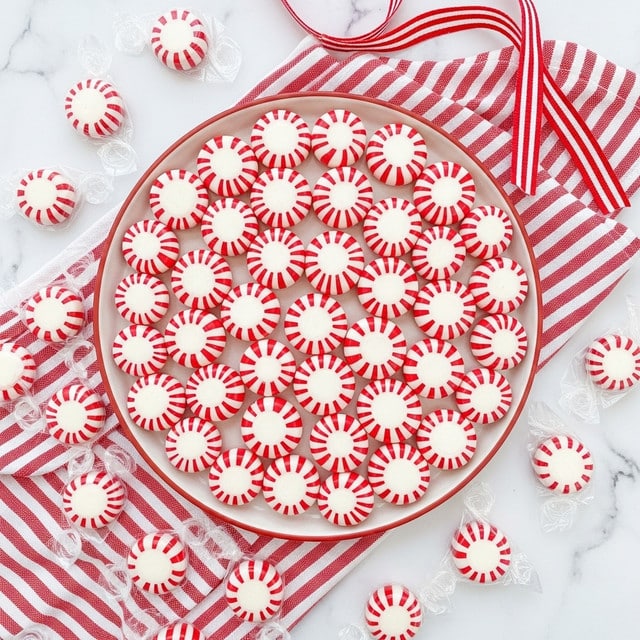
- 19 Peppermint Starlight Mints (per bowl)
Instructions
- Step 1: Preheat your oven to 300 degrees Fahrenheit.
- Step 2: Place a silicone baking liner or parchment paper on a baking sheet.
- Step 3: Lay one mint in the center of the baking liner. Arrange six more mints around the center mint to form a flower shape, making sure they touch closely with minimal gaps. Then create a second circle around this cluster using the remaining 12 mints.
- Step 4: Place the baking sheet in the oven. Watch carefully as the mints melt; this usually takes about 8 minutes but can vary. When the mints become shiny and start spreading out slightly, they are ready—avoid letting them bubble.
- Step 5: Prepare a small glass bowl by turning it upside down; this will be the mold for your candy bowl.
- Step 6: Remove the baking sheet from the oven and let the melted mints sit for about 30 seconds until cool enough to handle but still soft.
- Step 7: Carefully flip the silicone liner with the melted mints onto the upside-down glass bowl, aligning the center mint to the bowl’s center. Using oven mitts, gently press the mints to shape them around the bowl. You have less than a minute before they harden again.
- Step 8: Let the shaped mints sit on the bowl until fully set.
- Step 9: Remove the candy bowl from the glass and allow it to cool completely.
- Step 10: Fill your peppermint candy bowl with candies or treats and enjoy!
Tips & Variations
- Use a silicone baking liner instead of parchment paper for easier flipping and less chance of sticking.
- Keep a close eye on the melting process—oven temperatures vary, and mints can burn quickly.
- Try making bowls with different flavored hard candies for seasonal variations.
Storage
Store the peppermint candy bowls in an airtight container at room temperature to prevent moisture from softening them. They can last for up to a week if kept dry. Avoid refrigeration, as humidity may cause them to lose their crispness. If needed, gently warm the bowls in a low oven for a few minutes to restore firmness before use.
How to Serve
Serve this delicious recipe with your favorite sides.
FAQs
Can I use regular hard candies instead of peppermint mints?
Yes, you can use other hard candies, but peppermint mints work best for flavor and color. Be sure the candies melt evenly and avoid ones with fillings as they may not melt properly.
What if my candy bowl cracks when removing from the mold?
Cracking can happen if the candy cools completely before shaping or if the layer is too thin. Work quickly while the candy is still pliable and consider doubling up on mints for a thicker bowl.
Print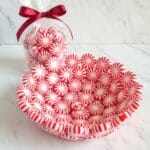
DIY Peppermint Candy Bowls Recipe
- Total Time: 15 minutes
- Yield: 1 peppermint candy bowl 1x
- Diet: Vegetarian
Description
Create festive and edible peppermint candy bowls using simple mints. These DIY peppermint candy bowls are perfect for holiday gatherings, serving treats or as a decorative edible container. Easy to make with minimal ingredients, they add a fun, minty touch to any celebration.
Ingredients
Ingredients
- 19 Peppermint Starlight Mints (per bowl)
Instructions
- Preheat Oven: Preheat your oven to 300 degrees Fahrenheit to prepare for melting the mints evenly without burning.
- Prepare Baking Sheet: Place a silicone baking liner or parchment paper on a baking sheet to prevent the mints from sticking.
- Arrange Mints: Lay one mint in the center of the liner. Surround it with six mints forming a flower shape, touching closely. Then, place the remaining 12 mints around the center circle, making a second outer circle.
- Bake Mints: Place the baking sheet in the oven for about 8 minutes. Watch carefully; when the mints look shiny and just start to spread and melt—but before they bubble—they’re done.
- Prepare Glass Bowl Mold: While the mints bake, get a small glass bowl ready by placing it upside down on a stable surface.
- Cool Mints Slightly: Remove the baking sheet and let the mints cool for about 30 seconds until they’re cool enough to handle but still flexible.
- Mold Candy Bowl: Wearing oven mitts, carefully flip the silicone liner with melted mints onto the upside-down glass bowl, aligning the candy center with the bowl’s center. Gently press and shape the mints around the bowl to form a bowl shape before they harden again (within about 1 minute).
- Set the Bowl: Allow the molded candy to cool and harden completely on the glass bowl.
- Remove and Use: Once set, gently remove the peppermint candy bowl from the glass mold.
- Fill and Serve: Fill your peppermint candy bowl with candies or treats and enjoy your festive creation!
Notes
- Watch the mints carefully during baking as oven temperatures vary; over-melting will cause bubbling and ruin the bowl shape.
- Use oven mitts to handle hot candy and silicone liner to avoid burns.
- Work quickly when molding as the candy hardens fast once removed from the oven.
- Use a small glass bowl that matches the size you want your final candy bowl to be.
- Store peppermint bowls in a cool, dry place to avoid melting.
- Prep Time: 5 minutes
- Cook Time: 8 minutes
- Category: Dessert
- Method: Baking
- Cuisine: American
Keywords: peppermint candy bowl, DIY candy bowl, edible bowl, holiday candy recipe, peppermint starlight mints, festive candy bowl
