
Crystal Candy Recipe
Introduction
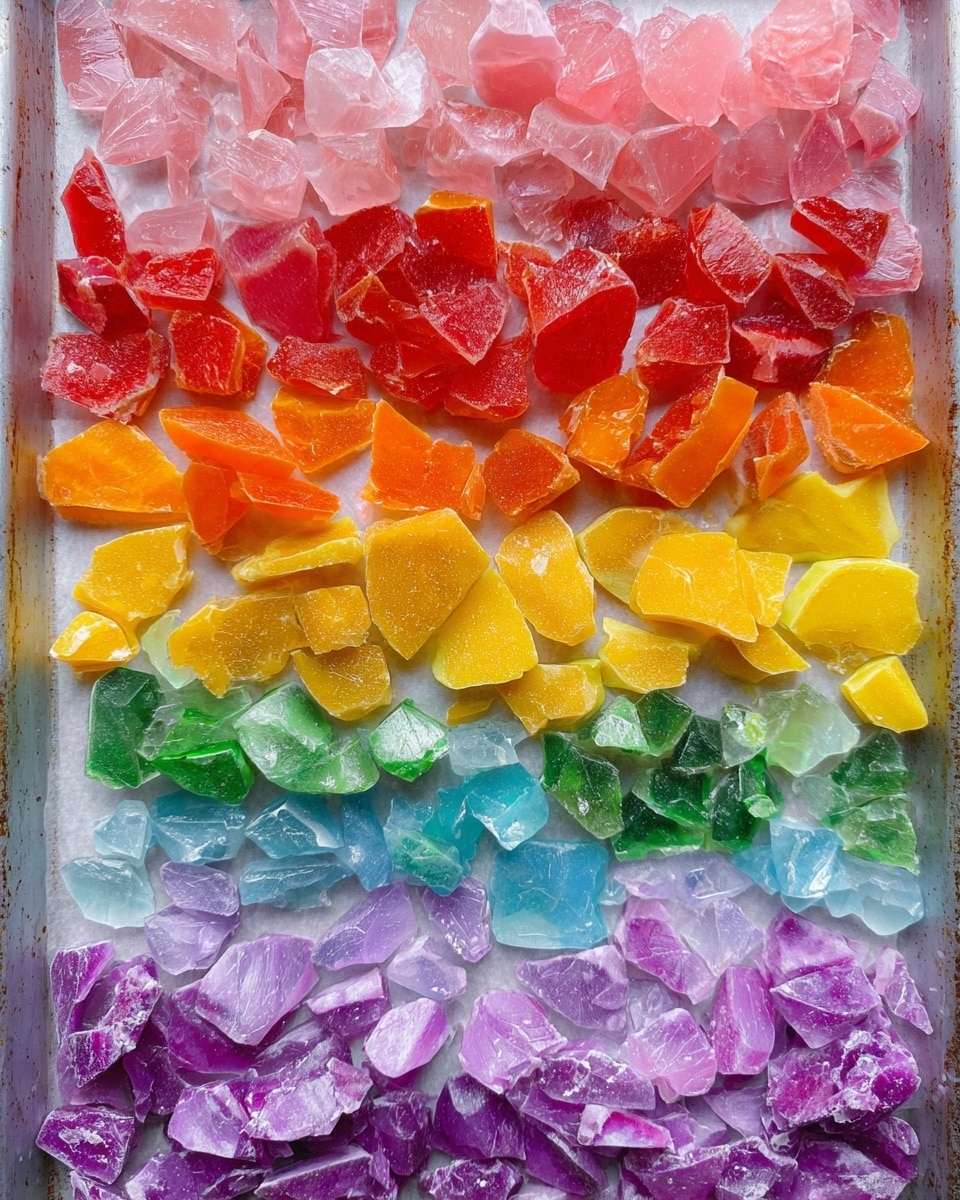
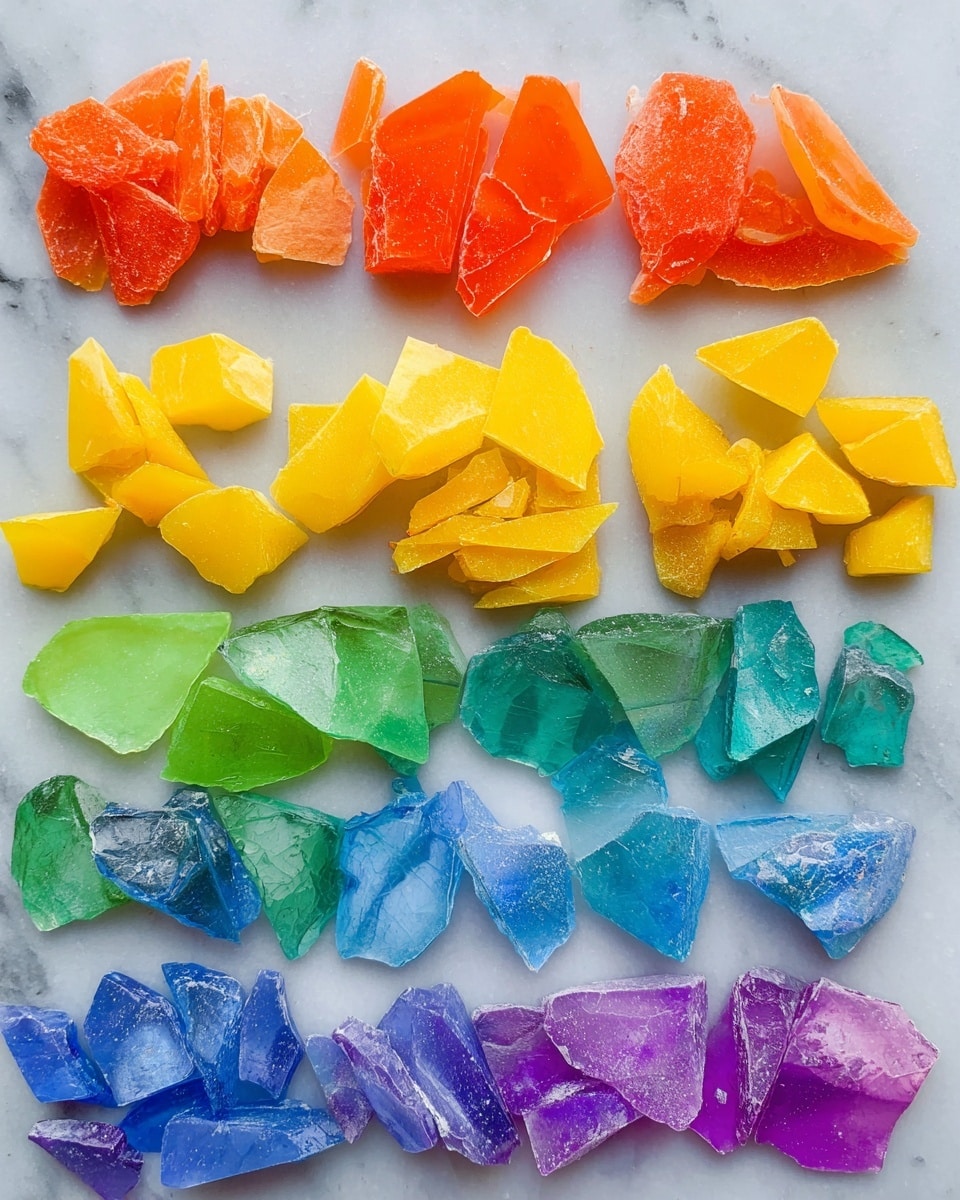
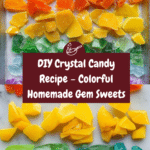
Crystal candy is a beautiful, gem-like treat that’s both fun to make and delightful to enjoy. With simple ingredients and customizable flavors and colors, you can create unique candies perfect for gifts or special occasions.
Ingredients
- 1⅔ cups water
- 3 teaspoons agar agar powder
- 3 cups granulated sugar
- ¼ teaspoon flavoring of choice
- 1-3 drops liquid food coloring (optional)
Instructions
- Step 1: Prepare your workspace by lightly greasing small containers or molds. Decide how many flavors and colors you want to make, and have your food coloring and flavoring ready to use, as the candy sets quickly.
- Step 2: In a small pot, add the water and sprinkle the agar agar powder on top. Stir gently and let it stand for 5 minutes to hydrate.
- Step 3: Bring the mixture to a boil and cook for 3 minutes. Add the sugar and stir until dissolved. Lower the heat and simmer for 2-3 minutes.
- Step 4: Remove from heat and divide the liquid evenly into the greased containers. Quickly add your chosen flavoring (about ¼ teaspoon total) and 1-3 drops of food coloring to each container as desired. Use a toothpick or wooden skewer to swirl the flavor and color through the candy gently.
- Step 5: Cover and refrigerate the containers for 1-2 hours until the candy is firm but still slightly sticky.
- Step 6: Run a knife around the edges and gently pop each candy slab out onto a cutting board. Cut the candy into desired shapes with a paring knife. Trim or bevel edges to enhance the crystal-like appearance. Save any scraps to add to a larger piece or form new clusters.
- Step 7: Place all candy pieces on parchment-lined baking sheets.
- Step 8: Store the candy in a cool, dry place for 5-7 days, turning them occasionally to help each piece develop a crust on the outside. Cover the candy with a lid if desired, but note this may slow crust formation.
- Step 9: Once fully crusted, optionally decorate the candy with edible gold luster dust or gold leaf for an elegant finishing touch.
Tips & Variations
- Experiment with different natural flavorings like lemon, rose, or peppermint to create unique tastes.
- Use gel or powdered food coloring instead of liquid for more vibrant colors without adding extra moisture.
- If you don’t have small containers, use silicone molds to create fun shapes.
Storage
Store crystal candy in a cool, dry place for up to 7 days. To maintain the crunchy crust, rotate the pieces every day. Avoid refrigeration after the initial setting to prevent moisture buildup. If the candy softens, allow it to air dry to regain firmness.
How to Serve
Serve this delicious recipe with your favorite sides.
FAQs
Can I use gelatin instead of agar agar?
Agar agar is a vegetarian substitute that sets at room temperature and creates a firmer texture. Gelatin can be used but may result in a softer candy and often requires refrigeration to set.
How do I prevent the candy from sticking to the containers?
Lightly grease your containers with a neutral oil or non-stick spray before pouring in the candy mixture. This makes removing the candy easier once set.
Print
Crystal Candy Recipe
- Total Time: 6 hours (including chilling and crusting time)
- Yield: Approximately 20–25 crystal candy pieces 1x
- Diet: Vegetarian
Description
This Crystal Candy recipe creates beautiful, gem-like candies using agar agar, sugar, and your choice of flavorings and colors. Perfect for a unique homemade treat, these candies are firm yet slightly sticky with a stunning crystalline appearance formed through a simple cooling and crusting process.
Ingredients
Main Ingredients
- 1 ⅔ cups water
- 3 teaspoons agar agar powder
- 3 cups granulated sugar
- ¼ teaspoon flavoring of choice
- 1–3 drops liquid food coloring (as desired)
Instructions
- Preparation Setup: Before starting, gather all ingredients and prepare small containers by lightly greasing them. Arrange your flavorings and food coloring nearby because the candy sets quickly after cooking.
- Soak Agar Agar: Add the water to a small pot, sprinkle the agar agar powder over it, stir gently, and let the mixture stand for 5 minutes to hydrate the agar.
- Boil Mixture: Bring the water and agar agar to a boil and let it boil for 3 minutes. Then add the granulated sugar, stir until dissolved, reduce heat, and simmer for an additional 2-3 minutes to ensure full incorporation.
- Divide & Flavor: Remove the pot from heat and quickly pour the hot candy liquid into the prepared containers. Add about ¼ teaspoon total of your chosen flavoring in small amounts per container to avoid overpowering, and add food coloring drops as desired.
- Swirl Colors and Flavors: Use a toothpick or wooden skewer to gently swirl the flavoring and coloring throughout the candy for a marbled crystal effect.
- Chill to Set: Cover the containers and refrigerate for 1-2 hours until the candy is firm but still slightly sticky.
- Demold and Cut: Use a knife to carefully pop the candy out onto a cutting board in one piece. Cut into desired shapes with a paring knife, trimming or beveling edges to enhance the crystal-like appearance. Gather scraps to form additional clusters if desired.
- Dry and Crust: Lay candy pieces on parchment-lined baking sheets and store in a cool, dry place for 5-7 days, rotating periodically to ensure all surfaces develop a crust. Covering the candy will slow this crusting process.
- Decorate (Optional): Once completely crusted, embellish your crystal candies with edible gold luster dust or gold leaf for a luxurious finish.
Notes
- Work quickly when pouring and flavoring the candy as it begins to set rapidly after cooking.
- Use light layers of flavoring to avoid overwhelming the sweet base.
- The crusting process is essential for the final texture and appearance of the candies.
- Store candies in a cool dry place rather than the refrigerator after initial setting to allow proper crust formation.
- Edible gold dust or gold leaf is optional but adds an elegant touch.
- Prep Time: 10 minutes
- Cook Time: 10 minutes
- Category: Candy
- Method: Stovetop
- Cuisine: International
Keywords: crystal candy, agar agar candy, homemade candy, gem candy, flavored crystal candy, sugar candy, colorful candy
