
No-Bake Chocolate Cherry Lush Recipe
Introduction
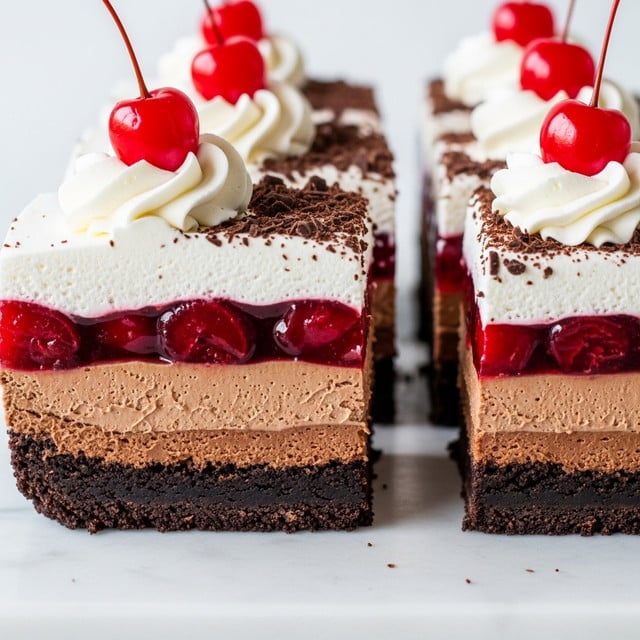
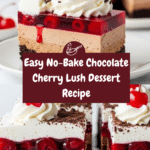
No-Bake Chocolate Cherry Lush is a luscious layered dessert that combines rich chocolate, creamy cheesecake, and sweet cherry pie filling. It’s easy to make and perfect for any occasion when you want an impressive treat without turning on the oven.

Ingredients
- 14.3 ounces chocolate sandwich cookies (approximately 36 cookies)
- ⅓ cup salted butter, melted (plus more for greasing the pan)
- 16 ounces cream cheese, softened
- 1 cup powdered sugar
- ¼ cup unsweetened cocoa powder
- 1 teaspoon vanilla extract
- ½ cup half & half (⅓ cup whole milk can be substituted)
- 42 ounces cherry pie filling
- 16 ounces frozen whipped topping Cool Whip, thawed
- Chocolate sprinkles (optional)
- 16 maraschino cherries (optional)
Instructions
- Step 1: Grease a 9×13-inch glass baking dish with butter and set aside.
- Step 2: In the bowl of a food processor, pulverize the chocolate sandwich cookies until small, even crumbs form. Add the melted butter to the crumbs and pulse until combined.
- Step 3: Press the crust mixture firmly into the prepared baking dish. Place the dish in the freezer to chill while preparing the cheesecake layer.
- Step 4: Using a hand mixer, beat the cream cheese, powdered sugar, cocoa powder, vanilla extract, and half & half together until smooth and fluffy.
- Step 5: Spread the chocolate cheesecake mixture evenly over the chilled crust.
- Step 6: Carefully spread the cherry pie filling over the cheesecake layer. If the cheesecake layer feels too soft, chill the dish in the freezer for about 15 minutes before adding the next layer.
- Step 7: Top the cherry layer with the Cool Whip, reserving about one cup if you want to pipe swirls on top later. Spread the Cool Whip smoothly across the surface.
- Step 8: Sprinkle chocolate sprinkles on top if desired.
- Step 9: Use a piping bag with a star tip to pipe soft swirls of the reserved Cool Whip on top of the dessert.
- Step 10: Place the dessert in the freezer to firm up for at least 2 hours.
- Step 11: Gently place a maraschino cherry on top of each piped swirl.
- Step 12: Cut into pieces and serve chilled.
Tips & Variations
- Substitute whole milk for half & half to lighten the cheesecake layer without sacrificing creaminess.
- Freeze for longer if you prefer a firmer texture, but allow a few minutes at room temperature before serving for easier slicing.
- Swap cherry pie filling for other fruit preserves like blueberry or raspberry for a different flavor twist.
- If you don’t have a piping bag, you can dollop the reserved Cool Whip with a spoon for a rustic look.
Storage
Keep the dessert covered tightly with plastic wrap or foil in the refrigerator if you plan to serve within 24 hours. For longer storage, freeze it in an airtight container for up to 1 month. When ready to serve, thaw in the refrigerator for several hours or overnight. Reheat is not necessary as this dessert is best enjoyed cold.
How to Serve
Serve this delicious recipe with your favorite sides.
FAQs
Can I make this dessert ahead of time?
Yes, this no-bake dessert is perfect for making a day or two in advance. Just keep it tightly covered in the refrigerator or freezer until ready to serve.
Can I use fresh cherries instead of pie filling?
While fresh cherries can be used, the pie filling provides a sweet, saucy layer that complements the texture well. If using fresh cherries, consider tossing them with a bit of sugar and cornstarch to create a similar effect.
Print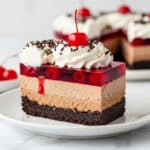
No-Bake Chocolate Cherry Lush Recipe
- Total Time: 2 hours 20 minutes
- Yield: 12 servings 1x
Description
This No-Bake Chocolate Cherry Lush is a luscious layered dessert featuring a crunchy chocolate cookie crust, a creamy chocolate cheesecake layer, sweet cherry pie filling, and fluffy whipped topping. It’s a delightful combination of rich chocolate and fruity cherry flavors that requires no baking, making it an easy and impressive dessert for any occasion.
Ingredients
Crust
- 14.3 ounces chocolate sandwich cookies (approximately 36 cookies)
- ⅓ cup salted butter, melted (plus more for greasing the pan)
Chocolate Cheesecake Layer
- 16 ounces cream cheese, softened
- 1 cup powdered sugar
- ¼ cup unsweetened cocoa powder
- 1 teaspoon vanilla extract
- ½ cup half & half (or ⅓ cup whole milk as substitute)
Fruit & Topping
- 42 ounces cherry pie filling
- 16 ounces frozen whipped topping (Cool Whip), thawed
- Chocolate sprinkles (optional)
- 16 maraschino cherries (optional)
Instructions
- Prepare the pan: Grease a 9×13-inch glass baking dish with butter to prevent sticking, then set it aside.
- Make the crust: In a food processor, pulse the chocolate sandwich cookies until they become fine, even crumbs. Add the melted butter and pulse a few more times to combine thoroughly.
- Form the crust layer: Press the cookie crumb mixture firmly into the bottom of the prepared baking dish. Place the dish in the freezer to chill while you prepare the next layer.
- Make the cheesecake layer: Using a hand mixer, beat together the softened cream cheese, powdered sugar, cocoa powder, vanilla extract, and half & half until the mixture is smooth and fluffy.
- Assemble the cheesecake layer: Spread the chocolate cheesecake mixture evenly over the chilled crust layer.
- Add cherry layer: Carefully spread the cherry pie filling on top of the chocolate cheesecake layer. If the cheesecake layer feels too soft, chill the dish in the freezer for about 15 minutes before adding cherries to help the surface firm up.
- Top with whipped topping: Spread the thawed Cool Whip evenly over the cherry layer, reserving about one cup if you want to pipe decorative swirls on top.
- Decorate: Smooth the Cool Whip topping, then sprinkle with chocolate sprinkles. Use a piping bag fitted with tip #1M to pipe soft swirls of the reserved Cool Whip over the dessert.
- Chill: Place the assembled lush in the freezer for at least 2 hours to firm up.
- Final garnish: Just before serving, gently place a maraschino cherry on top of each piped whipped topping swirl.
- Serve: Cut into squares and enjoy this rich, no-bake chocolate cherry dessert.
Notes
- For a firmer texture between layers, chill the dish for 15 minutes after adding each layer.
- You can substitute whole milk for half & half in the cheesecake layer if desired.
- Use gluten-free sandwich cookies to adapt this recipe for gluten-free diets.
- Store leftovers covered in the refrigerator for up to 3 days; the crust may soften slightly.
- Allow dessert to sit at room temperature for 10 minutes before cutting for cleaner slices.
- Prep Time: 20 minutes
- Cook Time: 0 minutes
- Category: Dessert
- Method: No-Cook
- Cuisine: American
Keywords: no bake dessert, chocolate cherry dessert, layered dessert, easy chocolate cheesecake, cherry pie filling dessert, cool whip dessert